Day 3 of My 30 Days of Architectural Design In SketchUp Challenge has hit, and I’m finally progressing. This is a series where I challenge myself to work on architectural design in SketchUp for at least 30 minutes (now one hour) every day and see where I end up. After two days of organizing things, I finally found a route that makes sense and am now making good progress. Let’s dive in!
Day 3 – I Finally Found a Good Direction
One of the troubles in the first two days of my SketchUp architectural design challenge was that I didn’t have a roadmap. I didn’t know whether I should be following a course or trying to model my custom project and use Google as my main help. After dabbling away on my custom project with no solid progress, I decided that a course would make much more sense.
Thus, I started today with an Udemy course I bought some time ago and found an excellent place to start. Today was all about creating walls and openings.
Following the course is the way to go. I learned so much today and picked up a ton of best practices that will undoubtedly help me in the future. The course has also clarified precisely what I need to do.
Modeling Walls and Openings
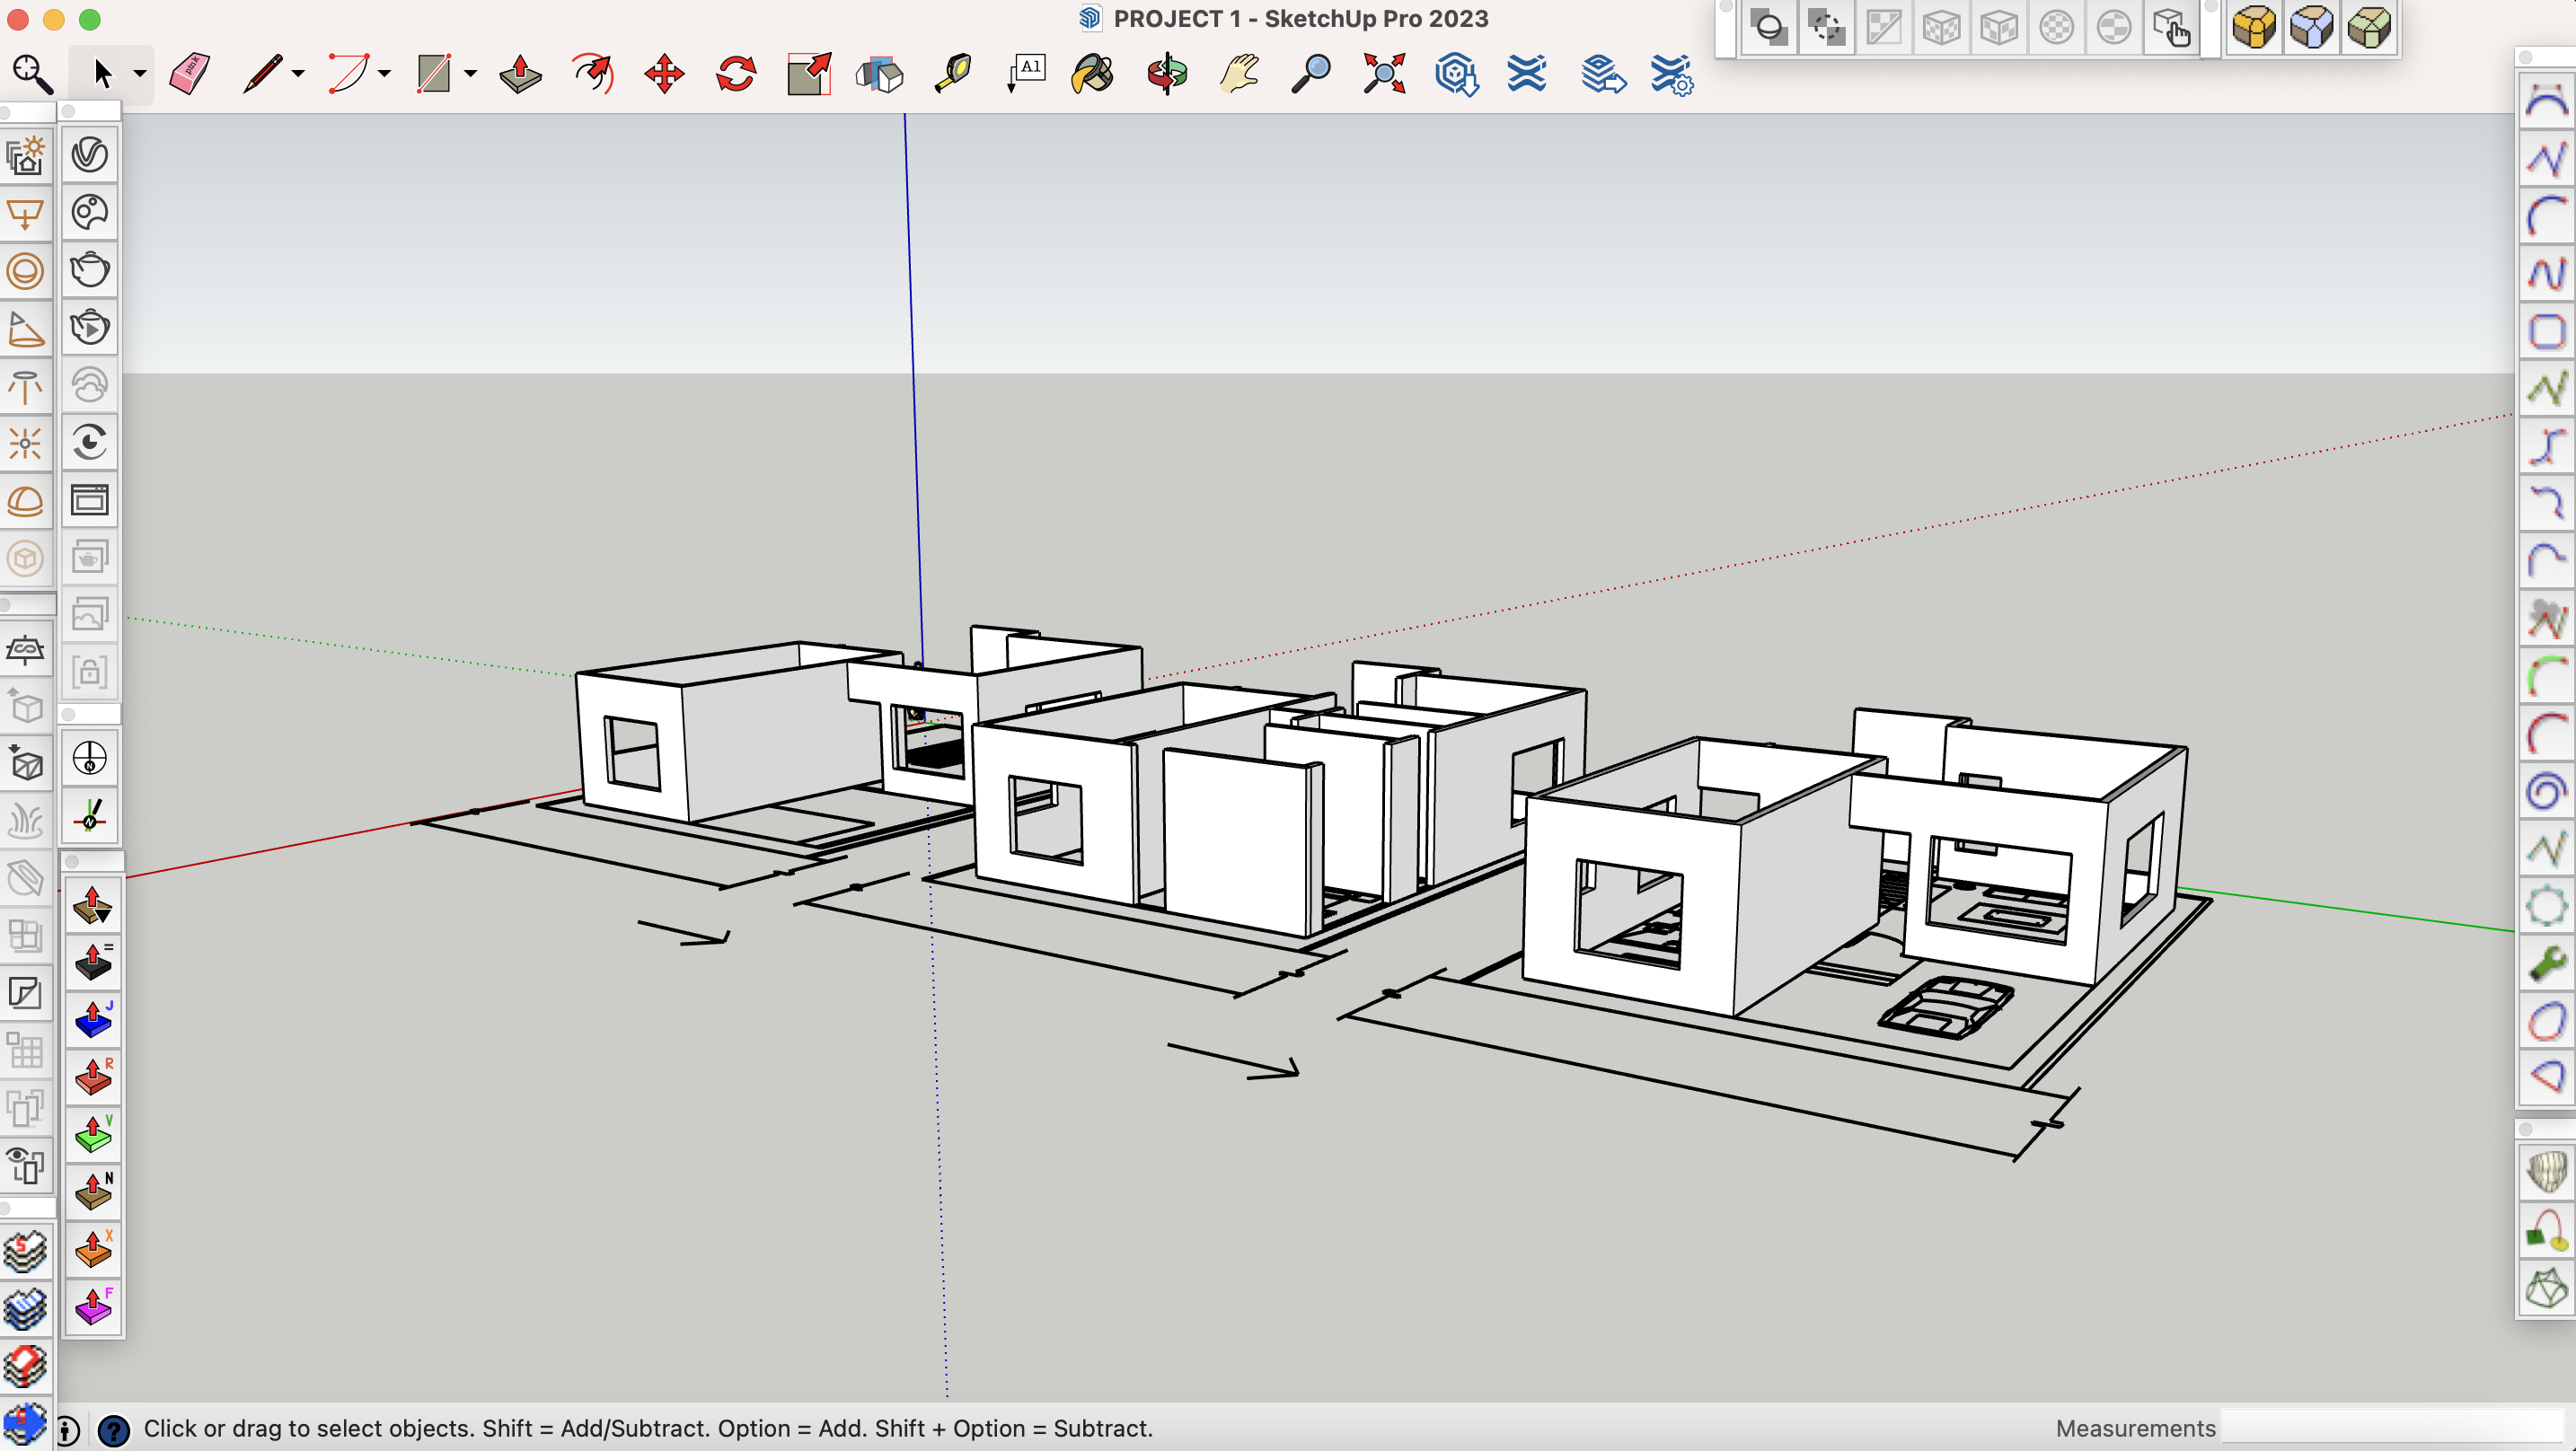
If you read yesterday’s post, you’ll see that the screenshot today shows much more progress (or at least I think it does) compared to what I did the day before.
And mind you, this was done in half the time since errands and my badminton training only left me with an hour to work on this SketchUp project. The credit goes to the modeling strategy I learned from the course today.
First, it starts with importing a good, organized CAD (preferably DWG) draft. If you import a clean draft that’s drawn to the correct scale, it makes 3D modeling in SketchUp so easy.
A clean DWG draft will give you many reference points, allowing you to simply trace the floor plans with your rectangle drawing tool. Then, you use the Push/Pull Tool to turn your 2D rectangles into walls.
Before you draw random walls, it’s also important to note how helpful it is to group a rectangle right at the start and then work in that group so that all your walls are effectively part of a “wall” group. From experience, this will be useful when adding things like the floor and furniture.
Additionally, more helpful tips from today include using the Option button (CTRL on Windows) with tools like the Move Tool, Push/Pull Tool, and others to create copies and bulk edit. It will help you 3D model more efficiently.
Continue Chipping Away
Hopefully, I’ll have my usual 2-hour time block to work on this project tomorrow. The work is simple. Follow the course and copy exactly what the instructor does. I plan to do this course on SketchUp exterior design and another on interior design. Once I complete both, I should be more familiar with using SketchUp and various best practices to pursue my custom projects.
But it all starts one step at a time. Let’s continue chipping away tomorrow!